Overview
After creating a Livecycle account, you can follow these steps to get started:
- Connect to Github and select a repository
- Choose a project template
- Review and build your configuration
We’ll explain how to navigate each of these steps below.
Sign up for Livecycle
- Before getting started installing Livecycle, make sure you’ve created a Livecycle account.
- Click here for more information about creating your Livecycle account
- After you’ve created your Livecycle account, the Configure New Project Wizard will appear, guiding you through the steps of installing Livecycle and configuring your project
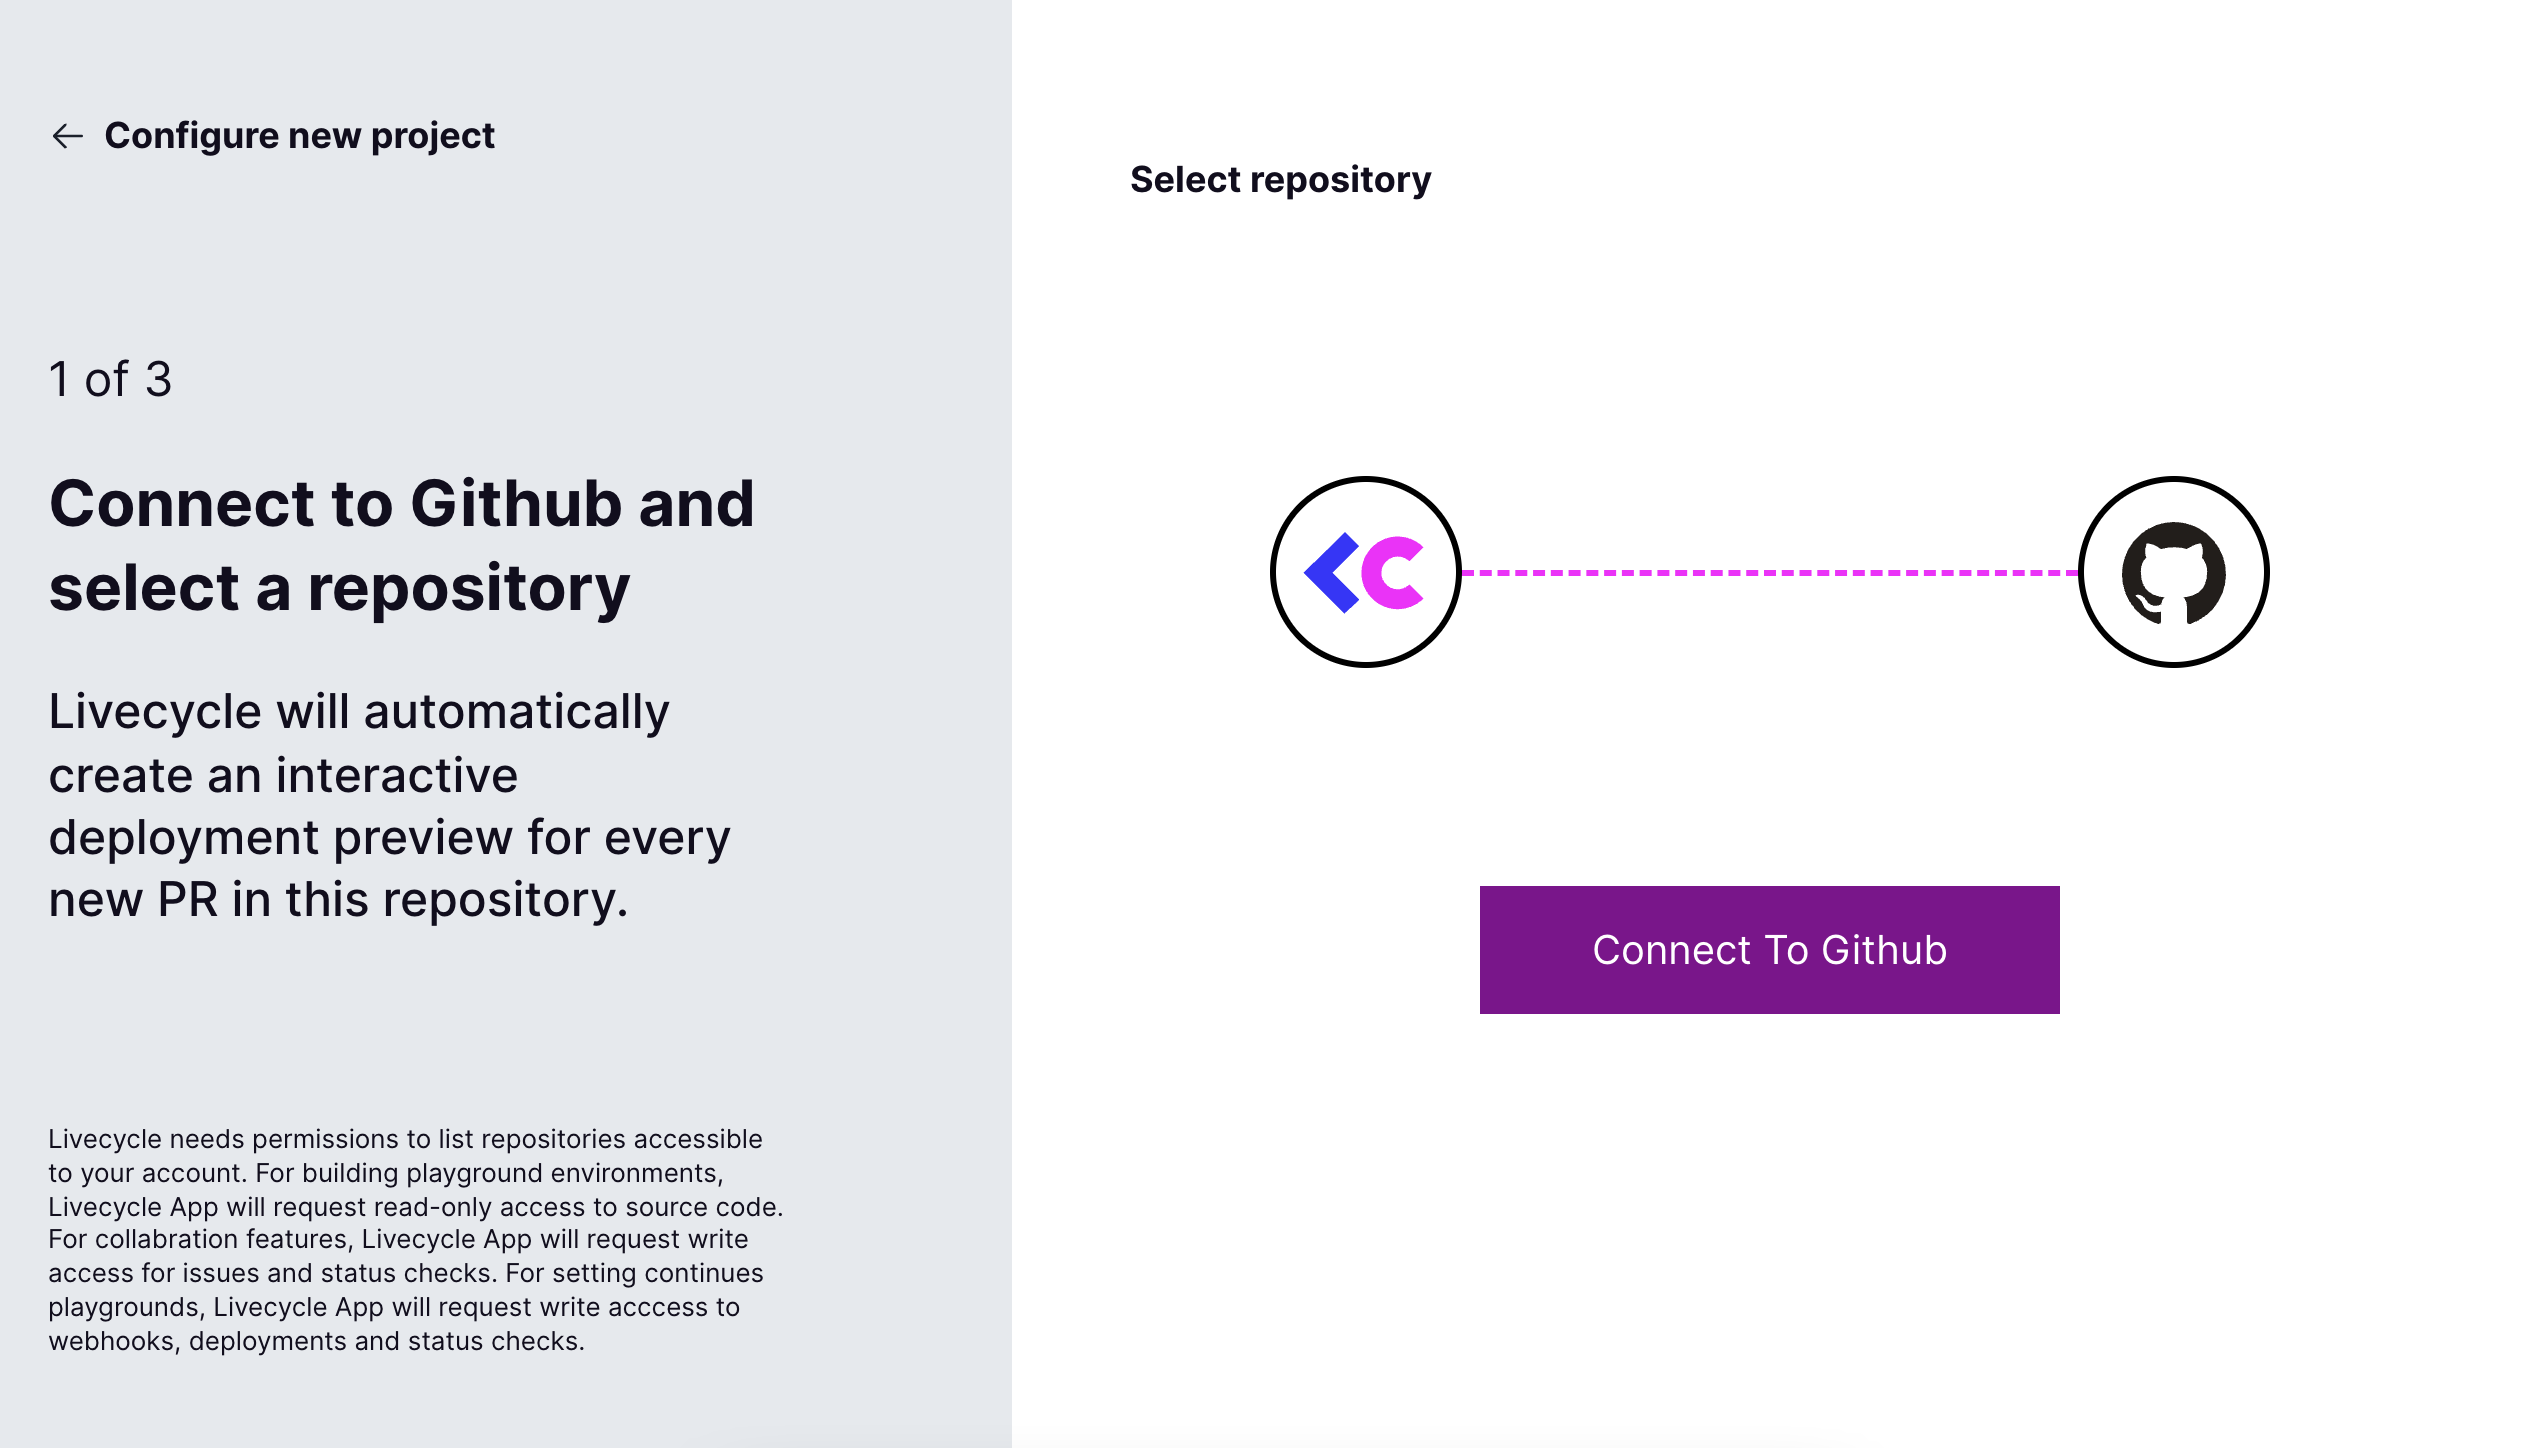
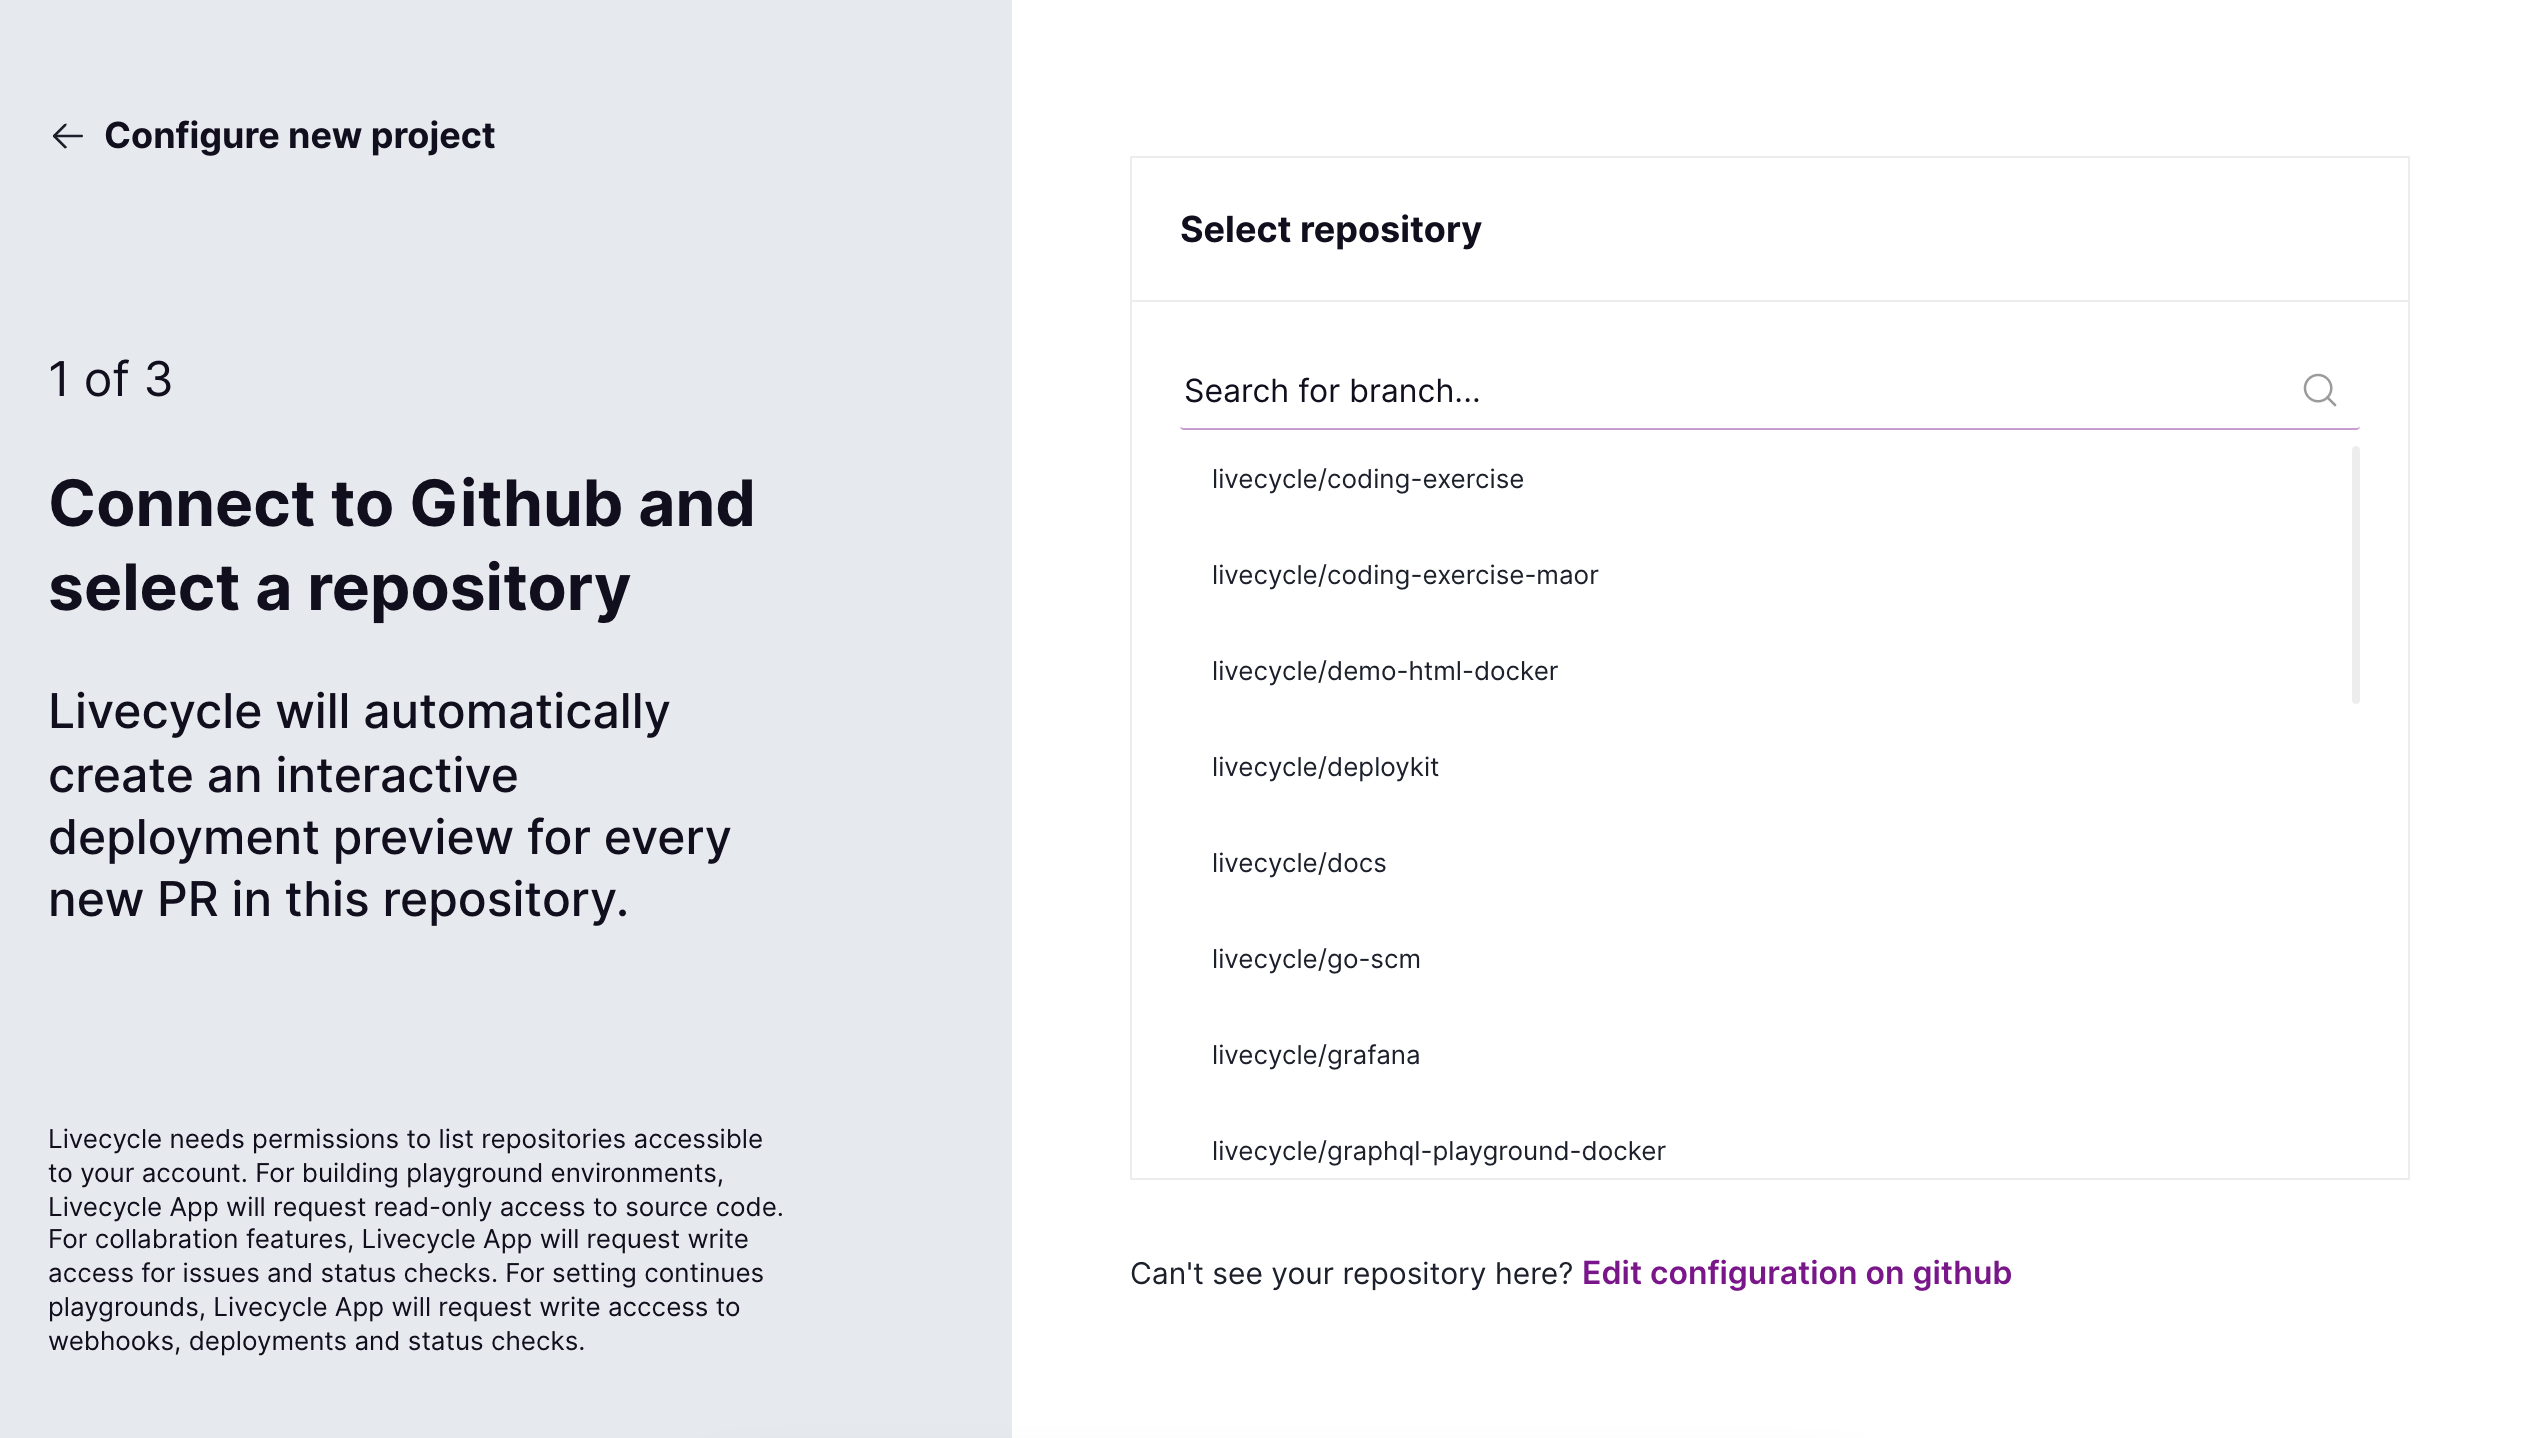
Connect to Github and Select a Repository
- Click the Connect to Github button in the Configure New Project Wizard. The Github login window will open
- Login to your Github account
- You will see a list of the repositories currently maintained in your Github account. Select the repository where you would like to install Livecycle. Livecycle will automatically create interactive deployment previews for every new PR in the selected repository
Next steps
Install Livecycle on your selected repository by using existing preview environments or configuring a build/deploy pipeline